March 24, 2010

Coffee for breakfast: Espresso Granola


It's been a long, strange trip perfecting this granola recipe. (You have to make a Dead reference in a post about granola, right?). I've gathered tips here and there, merged recipes from different blogs and books and friends... and now here we are.

Granola is something that was daunting to me for a long time. I'm not sure why – for some reason I thought it would take a long time to make, it wouldn't be as good as store bought... I also had no idea what a good granola recipe looked like. I couldn't glance at any old recipe online and judge whether it was worth it to try or not. This all changed a couple of years ago when I tried the Peanut Butter and Chips granola recipe from Have Cake Will Travel. A beautiful thing happens when you follow food blogs – after you've tried enough of someone's recipes, and have had positive results, you come to Trust them. So much so that you can try things that may have scared you in the past. So I made Celine's PB granola (minus the flax meal and chocolate chips, because I didn't have either of those things) one sunny spring day, around this time two years ago. It was a Sunday afternoon – my roommates and I had bowls of granola with almond milk, and sat in the yard playing guitar and soaking up the sun. It was one of those memorable, beautiful spring days when everything is perfect... You suddenly notice plants shooting out of the ground, and the birds come out of hiding. The ice begins to break free and float away on the river, the sun so bright you have to squint to see... The city is alive again, and you remember why you love it.

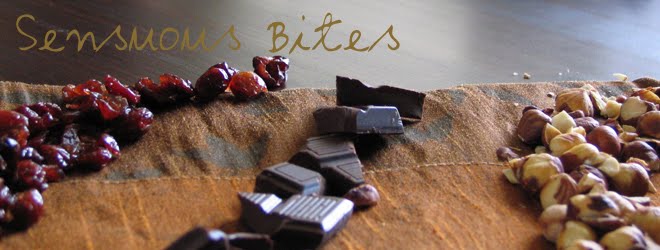
Maybe it was the springtime fever, but since that day I've been in love with granola. I make a big batch every couple of weeks, experimenting with different flavours and combinations of ingredients. This one is by far my favourite. There are lots of variations you can try with this recipe, too. This time I used pecans and dried cranberries, but another favourite of mine involves hazelnuts and dried cherries. And if you're feeling particularly indulgent – adding some chunks of your favourite chocolate makes this an amazing dessert (or breakfast...).


Espresso Granola

Note: This recipe is pretty forgiving when it comes to sweeteners. I use what I have on hand - mostly brown rice syrup and honey, with some maple syrup mixed in (because who doesn't love maple syrup?!)


Ingredients

3 cups rolled oats
3 pinches sea salt
4 Tbsp finely ground espresso
3/4 cup pecans

200ml brown rice syrup, honey, and/or maple syrup (see note)
1/4 cup light or neutral tasting olive oil
2 tsp vanilla extract

2/3 cup dried cranberries


Directions:

Preheat oven to 300
° F.

Mix together the dry ingredients (except the cranberries) in a large mixing bowl. In a separate bowl, whisk together the wet ingredients. Now add the wet ingredients to the dry, and mix thoroughly. This is when I normally put the spoon down and get my hands dirty. But whatever works for you. Now spread the mixture out onto a parchment-lined, rimmed baking sheet. Bake for approximately 40 minutes, stirring and checking every 10 minutes. When the granola has been baking for 30 minutes, check and stir every 5 minutes after that. The granola will crisp up once its cooled and out of the oven. You can tell it's done by the amazing smell, and normally by its golden colour, but with this recipe the espresso prevents you from seeing that. Once cool, stir in the dried cranberries.


March 9, 2010

Chai Kombucha: It's Alive!!


There has been a sinister creature lurking in my cupboard for the last month. Each day it grows - feasting on the sugars in my pantry - releasing a pungent odour. And really I think its dark presence in my house may have driven my roommate to move out... and yet, I love it. It's like a pet - we definitely have a symbiotic relationship. I remember to feed it, and it supplies me with fermented tea... Kombucha.

Some people call this strange culture a "mushroom," although it isn't one at all. It does resemble a thin, rubbery portabello mushroom cap, though, expanding to cover the surface of the sweet tea it eats. I've spoken to starry-eyed kombucha-lovers who've claimed they drink tea from the "mushroom" every day, and that it has a mild intoxicant property; like a very weak alcohol. (I can attest to this - after a day of volunteering at Ottawa's Raw food festival, eating raw cookies and drinking kombucha all day, I definitely did not have a level head).

And despite how mystical and strange this drink sounds, it's starting to become very well known. You can find it in glass bottles in most natural food stores. It's popularity could be chalked up to its deliciousness, it's natural effervescence, and its health benefits: as with most unpasteurized, traditionally fermented products, it's full of good bacteria. Watch out if you have a yeast sensitivity, though, as it does contain yeast as well. And unfortunately, it can't be made sugar-free, as the sugar itself is what the culture feeds off of. You can however use "raw" organic cane sugar, or any less refined cane sugar. In the future I plan to experiment with maple syrup and honey; I'll keep you posted.


Chai Kombucha

If you know someone with a kombucha "mother" to give you, that's great! Otherwise, it's easy to grow your own from an unpasteurized, store bought bottle of kombucha. Also, it's definitely possible to make a smaller batch than is outlined here; however I wouldn't make less than 2 litres, as to give the culture enough room to grow.


Equipment

4 litre glass jar or bowl (wide mouth is ideal)
Large, clean, dry, tea towel
Large elastic band
1 litre or 500 ml sealing glass jars

Ingredients

1 bottle of unpasteurized kombucha
3 litres filtered water
5 chai tea bags
1 cup raw organic cane sugar
Chai spices (optional: cardamom, cinnamon, nutmeg, black pepper, cloves)
fine mesh strainer or cheesecloth (optional)

Directions:

Make sure your hands and all of your equipment is impeccably clean. This will prevent harmful bacteria from contaminating your kombucha.

Boil the water for 5 minutes to sterilize it. Turn off the heat and add the tea bags. Let steep for 5 minutes or longer, to your liking. Add the cane sugar, stirring until dissolved. If you like your chai tea spicy, add chai spices to taste. Pour the tea into your glass bowl or jar, and let it come to room temperature. You should be able to hold your (clean) finger in the tea very comfortably without being too warm. Now empty the bottle of kombucha into your tea mixture, and stir (or for those of you with a pre-grown culture, add it now). Cover the bowl/jar with the tea towel, and fasten with the elastic band. Place the bowl in a cool dark place to allow fermentation.

When growing a new culture, allow approximately 3 weeks for the culture to mature. Once it has become a solid mass, either floating on top of the tea or within it, the tea should be ready to try. The tea will also begin to release an odour as it is closer to being ready. Allow it to ferment to taste - careful not to let it go too long or it will taste too much like vinegar.

With a full-grown culture, kombucha only takes a week to ferment.

Once the tea is fermented to your liking, set the culture aside and pour off the tea (through a fine mesh strainer or cheese cloth, if desired) into your sealer jars. Leave around 1/10 of the tea in the bowl/jar to continue to feed the kombucha and to add to your next batch. Ideally the jars should be filled all the way to the top, as this helps the kombucha to become naturally fizzy. Close the lids (loosely for safety, or more tightly for carbonation to occur) and place them on the counter for 2-5 days.

And now, you should have a naturally effervescent cocktail of deliciousness!

*Note: Careful not to leave tightly sealed jars of kombucha on the counter for too long, as they will continue to ferment, and create a high pressure seal!


January 13, 2010

Pumpkin Rosemary White Bean Soup


There's something about buying groceries to The Clash's "Clampdown" that makes me love my local grocery store. The employees often play their music at a subtle volume that shows they know that perhaps not everyone would enjoy it... And maybe the other shoppers are quietly seething. But in any case, it makes my day. That, and the beautiful pumpkin I brought home with me.


Squashes often end up sitting on my counter, forgotten, until their last breath almost escapes and I rush to find something to do with them. But not this time! This pumpkin was so beautiful I dreamt of what I would use it for on the way home from the store. And as we've been serving a vegan squash soup at the restaurant lately, I thought I'd do my own take on a classic.


Don't get me wrong; I love creamy, buttery, rich squash soups. But as a health-conscious cook, I decided to find that same creaminess from another ingredient: white beans. I wanted this soup to be hearty; nutritionally balanced; and frankly, I didn't want to make anything else for dinner. So white beans fit the bill; adding protein, flavour, and substance.

Oh yeah, and, as with most soups, the flavours of this one develop as it sits in the fridge - so don't be afraid to make it in advance.


Pumpkin Rosemary White Bean Soup
serves 6

1 small pumpkin
3 small-medium apples
extra-virgin olive oil
dried rosemary
nutmeg
salt and pepper

1 T extra-virgin olive oil
1 medium onion (diced)
3 medium cloves of garlic (minced)
scant 1/4 cup balsamic vinegar
4 cups vegetable broth
2 cups well-cooked white beans (canned is fine)
1/2 tsp nutmeg
1 1/2 tsp dried rosemary
generous pinch of cloves
salt and pepper (to taste)

Directions:
Preheat oven to 375°.
Cut the pumpkin in half, scoop out the stringy bits and reserve the seeds. Place the pumpkin flesh-side up on a baking sheet. Generously rub extra-virgin olive oil on the inside of the pumpkin. Sprinkle generously with salt, pepper, and dried rosemary. Turn the pumpkin over so the hard skin is facing up. Halve and core the three apples and rub a small amount of olive oil on them. Sprinkle a generous pinch of nutmeg and salt over them. Turn them peel up on the same baking sheet. Roast until the apples are tender - approximately 10-15 minutes. Remove the apples from the baking sheet and set aside. Continue roasting the pumpkin until tender (time varies according to the size of the pumpkin, but aim for approximately 40 minutes to an hour).

While the pumpkin is roasting, dice the onion and mince the garlic. Once the roasted apple is cool, chop it into manageable chunks. Heat the tbsp of extra-virgin olive oil over medium heat in a large pot. Sauté the onion, stirring occasionally, for around 10 minutes, or until translucent. Add the garlic and continue to cook for around 30 seconds. Now add the nutmeg, rosemary, cloves, and a 1/2 tsp of salt (salting the onions early leads to a more complex flavour). Deglaze the pot with the balsamic vinegar, stirring to loosen any onion stuck to the bottom of the pot. Now add the vegetable broth, white beans, and apple.

If the pumpkin is done roasting by this point, you'll want to remove the skin with a knife (or your fingers if it peels away easily). Careful - it's hot! You may want to wait until it cools a bit, unless you're impatient like me. Chop the pumpkin into manageable chunks and throw it in the pot. Bring the soup to a boil (it'll be easier to blend smooth while it's hot). Now, blend the soup using a hand blender or in batches with a blender/food processor.

Taste the soup and adjust seasonings; adding salt and pepper to taste. You may wish to thin out the soup a bit with water or vegetable broth. If you want more acidity, add a touch more balsamic vinegar.

I garnished this soup with spiced pumpkin seeds (Recipe to follow soon!), but you could even just toast the reserved pumpkin seeds (without the stringy pulp) with oil and salt for 8 or so minutes in a 350° oven.